


Showing posts with label do-it-yourself. Show all posts
Showing posts with label do-it-yourself. Show all posts
Monday, October 1, 2012
overnight [no heat] hair curl!
OK! so basically what i did was wrap my hair around the headband & braided what was left over. of course my intelligent self forgot to put in the part of the video where i mentioned that you go to bed, leave the headband overnight & in the morning you take it off. it's pretty simple, loved the results. got many compliments about the hair & my headpiece. teehee. hope you give it a go!
xo!
lau!

Thursday, September 6, 2012
DIY! High Waisted Distressed Jean Shorts!
Hey reader! Bianca here! Recently I've been wanting to get the very oh so popular high waisted jean shorts, yet when I would shop online or simply go to an Urban Outfitters store the shorts were about $50 dollars and over! WAY too much when you can simply do them yourselves! Yes, you have to go through the hassle of finding the perfect pair from thrift store to thrift store but what if I told you the shopping is not as bad when you can only spend just a couple of minutes at a thrift store and have your shorts done at home all for only $5! Now what I did is that I shopped at various thrift stores in my area, or you can always get lucky at any Goodwill! I found 3 pairs of jeans but customized only one for now. Now just follow these simple steps with pictures to guide you and you'll see how simple it is all under $50 dollars!
--> Now what you will need to find is a good pair of what are known as "mom jeans". These jeans are usually baggy from the waist down yet they curve up your hips and reach up to your waist and hiding your belly button. Brands you can try looking for are DKNY, Levis, GAP,or Old Navy which is actually the pair I'm using for this DIY.

Now either lay your jeans on a flat surface, or try them on to see where you want to cut them. You can cut them straight or diagonal all depending on how you want the shape of the shorts to be!
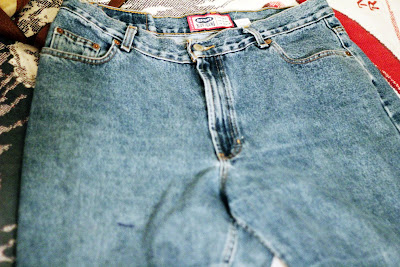
When you know where you want to cut them simply just grab a pen and mark the part where you want to cut the jeans!

Now once you have your jeans marked and ready to go grab a very good pair of scissors that could cut through the thick material of these jeans!

Lay your jeans out again on a flat surface and straighten out the legs of the jeans and make sure they're lined up right so once you begin cutting they don't come out crooked! Grab your pair of scissors and grab both the front and back of the leg of the jeans and start cutting along where you marked your jeans! When you finish one leg and will begin the next one simply just fold the cutted leg over the long one and cut along the edge of the one that is already cut so that both legs are even!

Now here comes the distressing part! Go to your kitchen and grab a knife! If you don't want to use a knife you can also use a razor, or the edge of your scissors for this next step!

Grab your scissors again and pinch any part of the shorts where you want to distress and cut! You will now have a small hole where you cut into the shorts and to make the hole long just cut two small slits on the side of the hole! (WARNING!! If you're going to cut around the pocket area make sure you remove the pocket away from where you will cut into the shorts!!)Now grab your knife and start rubbing the edge of the knife back and forth from the cutted area. Little pieces of the jean material will start shredding out which is what you exactly want and need! This will take patience because remember the material of the jeans is rough and thick! Be careful when you rub back and forth! Keep your fingers away from the blade of the knife and you can rub the material quick, but just keep your fingers away we do want to finish this project!

You can do the previous step in any part of your shorts! It all depends on how distressed you want your shorts to be! I did certain spots and small holes on mine!


You can also distress the end of where you cut your shorts so they don't look so straight, yet since I will be folding the edge of my shorts then I just distressed them a little

Now the tearing and shredding is all done! Though there is also one last and final step! If you really want a good finished project you can try washing your shorts which makes all the distressed parts even more distressed looking and intense which in that case it will make the shorts look more worn out and old which is the look you want to go for!

and VOILA! You now have your high waisted jean shorts! All under $50 and the way you want them!


I would also like to thank one of my chihuahuas, Paco! For giving me company while working on this project, even though he was just a little sleepy!

Happy Blogging!
Love, Bianca<3
--> Now what you will need to find is a good pair of what are known as "mom jeans". These jeans are usually baggy from the waist down yet they curve up your hips and reach up to your waist and hiding your belly button. Brands you can try looking for are DKNY, Levis, GAP,or Old Navy which is actually the pair I'm using for this DIY.

Now either lay your jeans on a flat surface, or try them on to see where you want to cut them. You can cut them straight or diagonal all depending on how you want the shape of the shorts to be!

When you know where you want to cut them simply just grab a pen and mark the part where you want to cut the jeans!

Now once you have your jeans marked and ready to go grab a very good pair of scissors that could cut through the thick material of these jeans!

Lay your jeans out again on a flat surface and straighten out the legs of the jeans and make sure they're lined up right so once you begin cutting they don't come out crooked! Grab your pair of scissors and grab both the front and back of the leg of the jeans and start cutting along where you marked your jeans! When you finish one leg and will begin the next one simply just fold the cutted leg over the long one and cut along the edge of the one that is already cut so that both legs are even!

Now here comes the distressing part! Go to your kitchen and grab a knife! If you don't want to use a knife you can also use a razor, or the edge of your scissors for this next step!

Grab your scissors again and pinch any part of the shorts where you want to distress and cut! You will now have a small hole where you cut into the shorts and to make the hole long just cut two small slits on the side of the hole! (WARNING!! If you're going to cut around the pocket area make sure you remove the pocket away from where you will cut into the shorts!!)Now grab your knife and start rubbing the edge of the knife back and forth from the cutted area. Little pieces of the jean material will start shredding out which is what you exactly want and need! This will take patience because remember the material of the jeans is rough and thick! Be careful when you rub back and forth! Keep your fingers away from the blade of the knife and you can rub the material quick, but just keep your fingers away we do want to finish this project!

You can do the previous step in any part of your shorts! It all depends on how distressed you want your shorts to be! I did certain spots and small holes on mine!


You can also distress the end of where you cut your shorts so they don't look so straight, yet since I will be folding the edge of my shorts then I just distressed them a little

Now the tearing and shredding is all done! Though there is also one last and final step! If you really want a good finished project you can try washing your shorts which makes all the distressed parts even more distressed looking and intense which in that case it will make the shorts look more worn out and old which is the look you want to go for!

and VOILA! You now have your high waisted jean shorts! All under $50 and the way you want them!


I would also like to thank one of my chihuahuas, Paco! For giving me company while working on this project, even though he was just a little sleepy!

Happy Blogging!
Love, Bianca<3
Friday, August 24, 2012
diy lace shorts!
mr. kate posted this DIY a few weeks ago. i had been wanting to do it but i felt weird about cutting up shorts...then i remembered an old pair i hadn't worn in a while because the side had ripped. so fear & all..i began to cut & sew. here's how it goes:
 these were the orginal shorts with the tear they had.
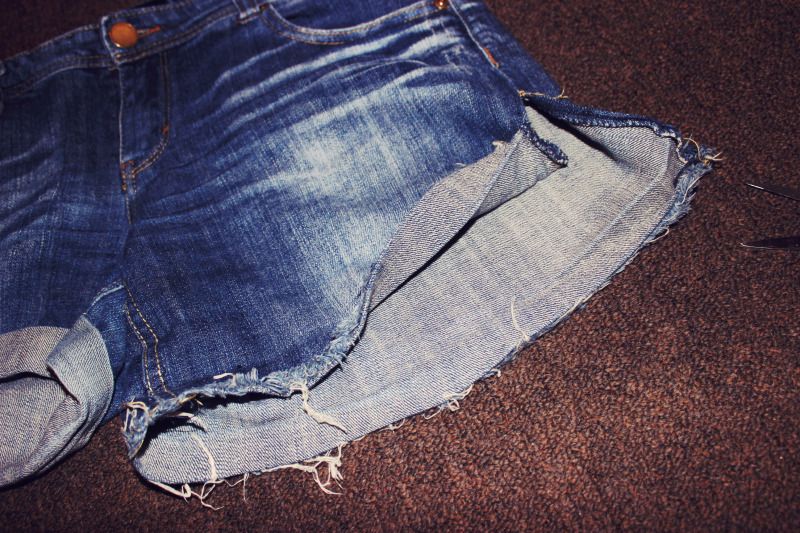 i cut the seams & they ended up like board shorts. i thought they were too long so i did a single fold rather than multiple folds like it originally had.
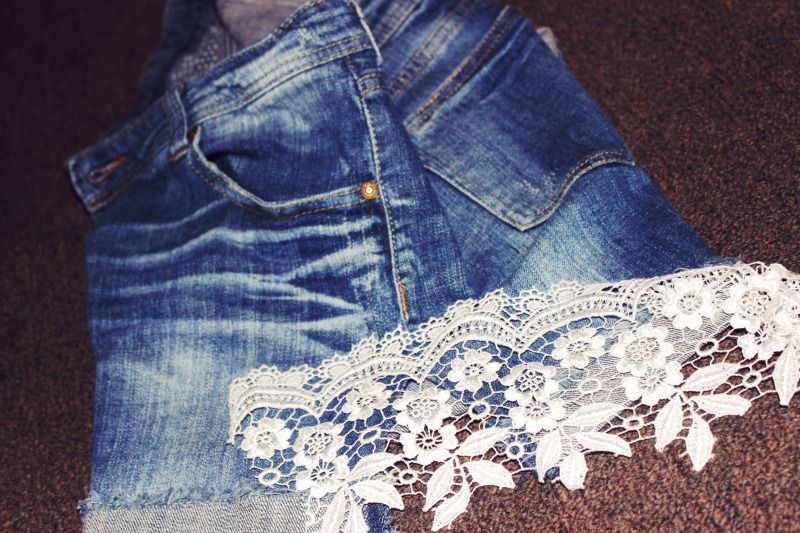 i laid it out before cutting the lace. needed to get the vision first! :P
END RESULT!
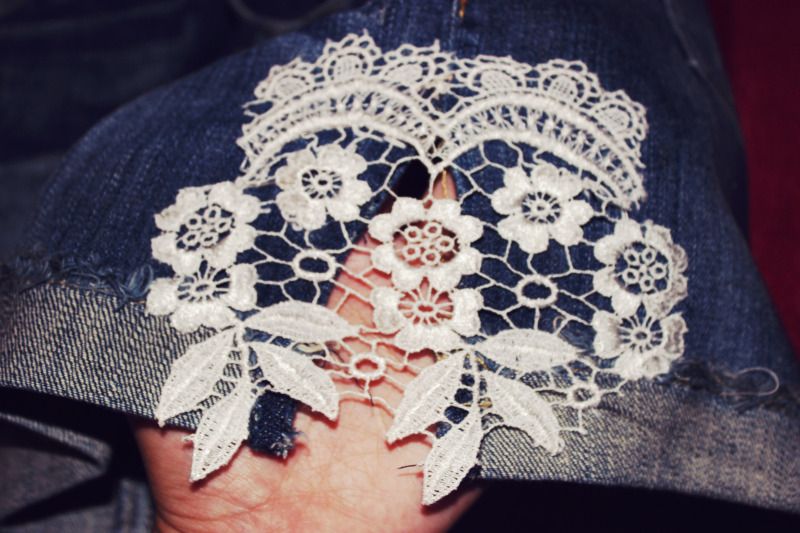
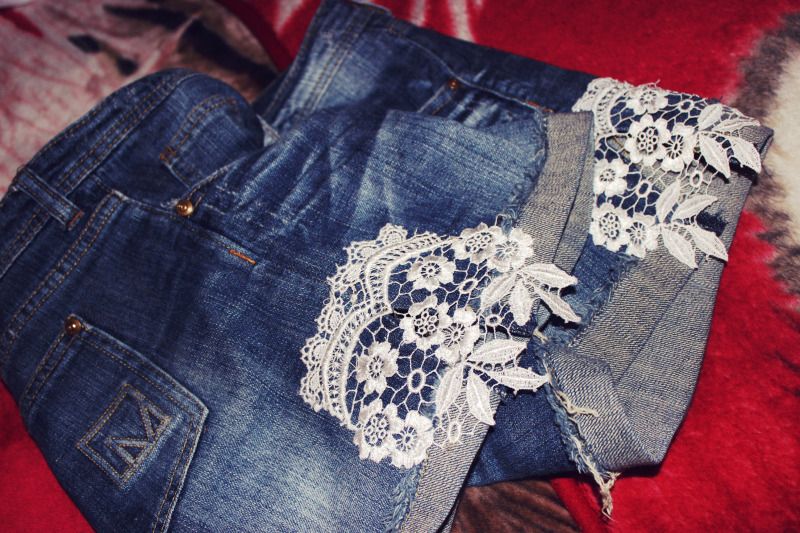
they look awesome on! i'll make it an ootd! as soon as i wear them again! click here to see the original DIY video by mr. kate! :)
xo!
lau!
END RESULT!
xo!
lau!
Saturday, June 9, 2012
that's so diy: glow mason jars

so as i was being an unproductive person, i ran into pictures of these glowing mason jars while i was browsing pinterest & tumblr. i thought they were awesome but the even better part is how ridiculously easy they are to make! "so diy!" my friends!
basically all you need is:
- mason jar or vase
- glow sticks [they are so cheap at the 99 cents store or dollar tree..]
- scissors
- rubber gloves [unless you're ok with being a "cullen" lol.]
make sure your jar/vase is clean & dry. then cut open your glow sticks very carefully & drain all the liquid into the jar. swirl it all around and dump out any pieces of plastic that may have fallen into the jar [i read they were glass. eek.]
& TAH-DAH my friends! you've got yourself a nice little glowing mason jar! or vase. hehe.
i have bought a ton of glow sticks recently because i am having an 80s themed party coming up...if i have any left over i wil definitely be making one of these bad boys!
xo!
lau!
Wednesday, May 2, 2012
Arizona Green Tea Can-Candle!
Hey Guys! Bianca here :D This is my first post here at CKTO and I thought it be nice to start off with a DIY! Awhile ago I posted on my personal Facebook a little project I did on my free time and a lot of people liked the idea, so here I am to show you guys how to create a candle out of a Arizona Tea Can so you can have one of your own!
Things you need:
-Empty Arizona Green Tea can
-Needle
-Sand or Small towel
-Knife or Scissors
-Small candle
I personally like the nice cherry blossom design that the Arizona Green Tea can has, yet if you find another Arizona can or even any other can with a cool design then go for it!
What to do:
1) First of all, of course, empty the can. Drink it or if you don't like the flavor of the drink then dump it out :D
2) With a knife or sharp scissors cut out the bottom of the can so then you have a hole so later on you can insert the candle!
3) Once your can has a hole at the bottom stuff the inside with either sand or if you don't have sand stuff the inside of the can with a thick small towel, and make sure it's nicely stuffed. This is very useful in the case that when you start poking holes in the can, you don't squeeze and dent the can in the process!
4) Now grab your needle and start poking small holes along the line of the design of the can. Now in this step it is all all up to you of how and what you want the candle to show when you light the candle. I just poked holes in the places i wanted the light of the candle to shine through! :D
5) Once you are done with the design of your can grab your small candle (the candle has to be wide enough to fit into the can and tiny enough so it doesn't pass the upper half of the can, or else it will burn the top of the can)Light up the candle, and place the can on top and your can is a candle! :D
My Can-Candle :)

Things you need:
-Empty Arizona Green Tea can
-Needle
-Sand or Small towel
-Knife or Scissors
-Small candle
I personally like the nice cherry blossom design that the Arizona Green Tea can has, yet if you find another Arizona can or even any other can with a cool design then go for it!
What to do:
1) First of all, of course, empty the can. Drink it or if you don't like the flavor of the drink then dump it out :D
2) With a knife or sharp scissors cut out the bottom of the can so then you have a hole so later on you can insert the candle!
3) Once your can has a hole at the bottom stuff the inside with either sand or if you don't have sand stuff the inside of the can with a thick small towel, and make sure it's nicely stuffed. This is very useful in the case that when you start poking holes in the can, you don't squeeze and dent the can in the process!
4) Now grab your needle and start poking small holes along the line of the design of the can. Now in this step it is all all up to you of how and what you want the candle to show when you light the candle. I just poked holes in the places i wanted the light of the candle to shine through! :D
5) Once you are done with the design of your can grab your small candle (the candle has to be wide enough to fit into the can and tiny enough so it doesn't pass the upper half of the can, or else it will burn the top of the can)Light up the candle, and place the can on top and your can is a candle! :D
My Can-Candle :)

Subscribe to:
Posts (Atom)